30 December 2011

Merry Christmas

Welcome one and all to my Christmas post . I wanted just to show you all how I decorated the house for Christmas this year. This is my first year with a proper house to decorate myself and our new livingroom meant a lot of decorating fun. The pictures below should show what I have been up to - although my displays seem to change on a nearly daily basis as I change my mind as to what should be be where and find extra bits that fit!


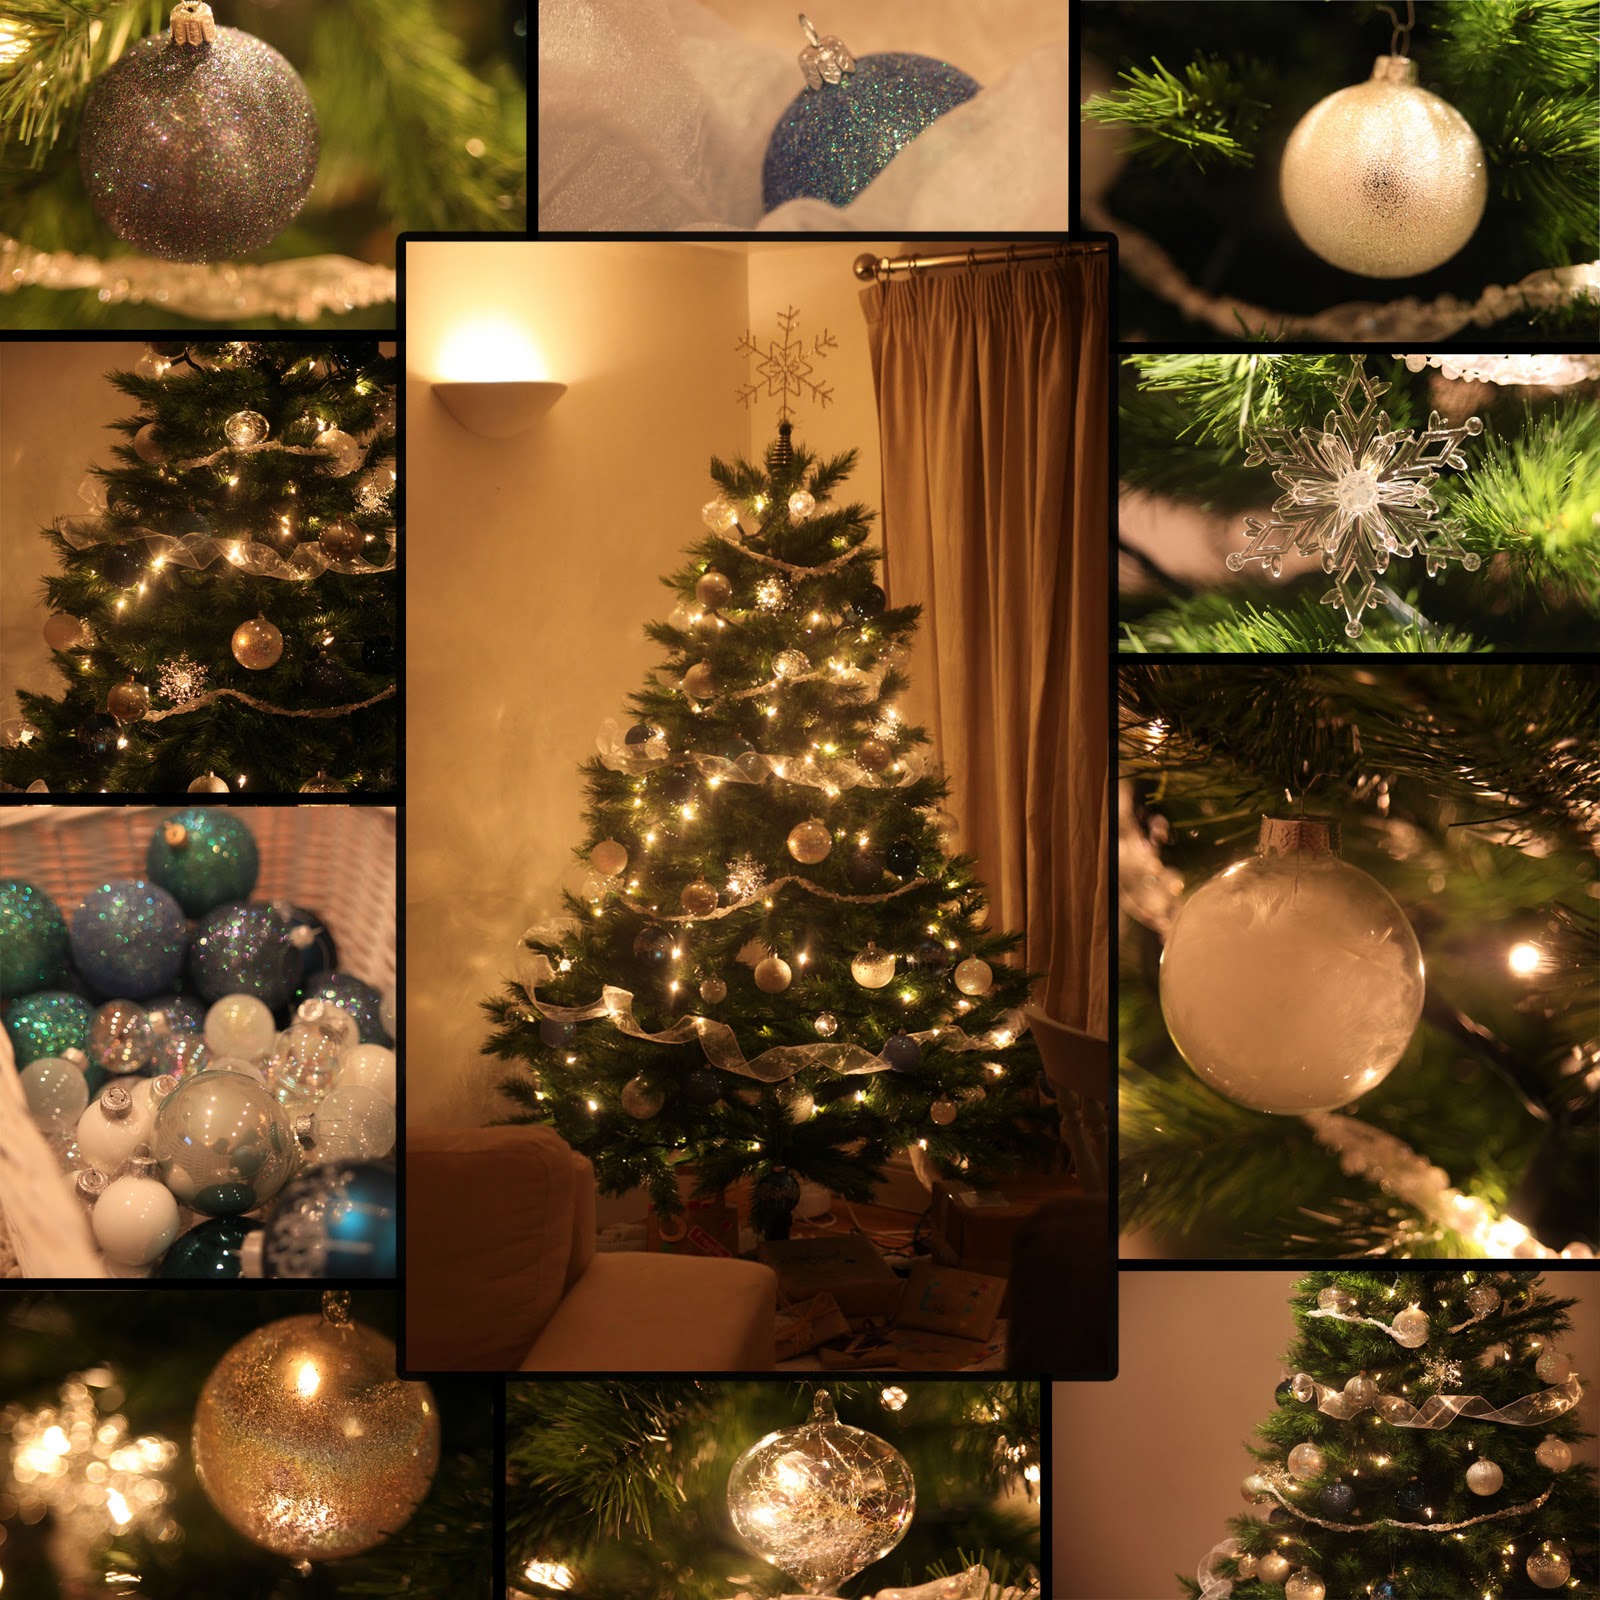
For the tree I started by unwrapping all my baubles so that I could clearly see what I had to work with. I put the lights on first of all and then add the baubles ( I tend to buy 3 of each and place them so that they form a visual triangle) Try and place clear baubles in front of the light bulbs to add interest. Last of all I add the ribbons and strings (or tinsel if you prefer). For the ribbon I use ribbon that has wire around the edges and curl it tightly around the spool. Then it stays coiled as I pull it off and lay it straight on to the tree.

I have always been a sparkly bauble kind of girl - they were my favourites on my mums tree. I stick mostly to round baubles but this year I fell for some onion shaped baubles with strands of glass inside. They are beautiful and I also added some plastic snowflakes. These add interest and really throw the lights.


I should also briefly mention that my tree only looks like this because I don't currently have children. I am enjoying being able to have delicate glass ornaments and precision placement while I can.  I will be employing more family friendly techniques when I have children and I will love that just as much.

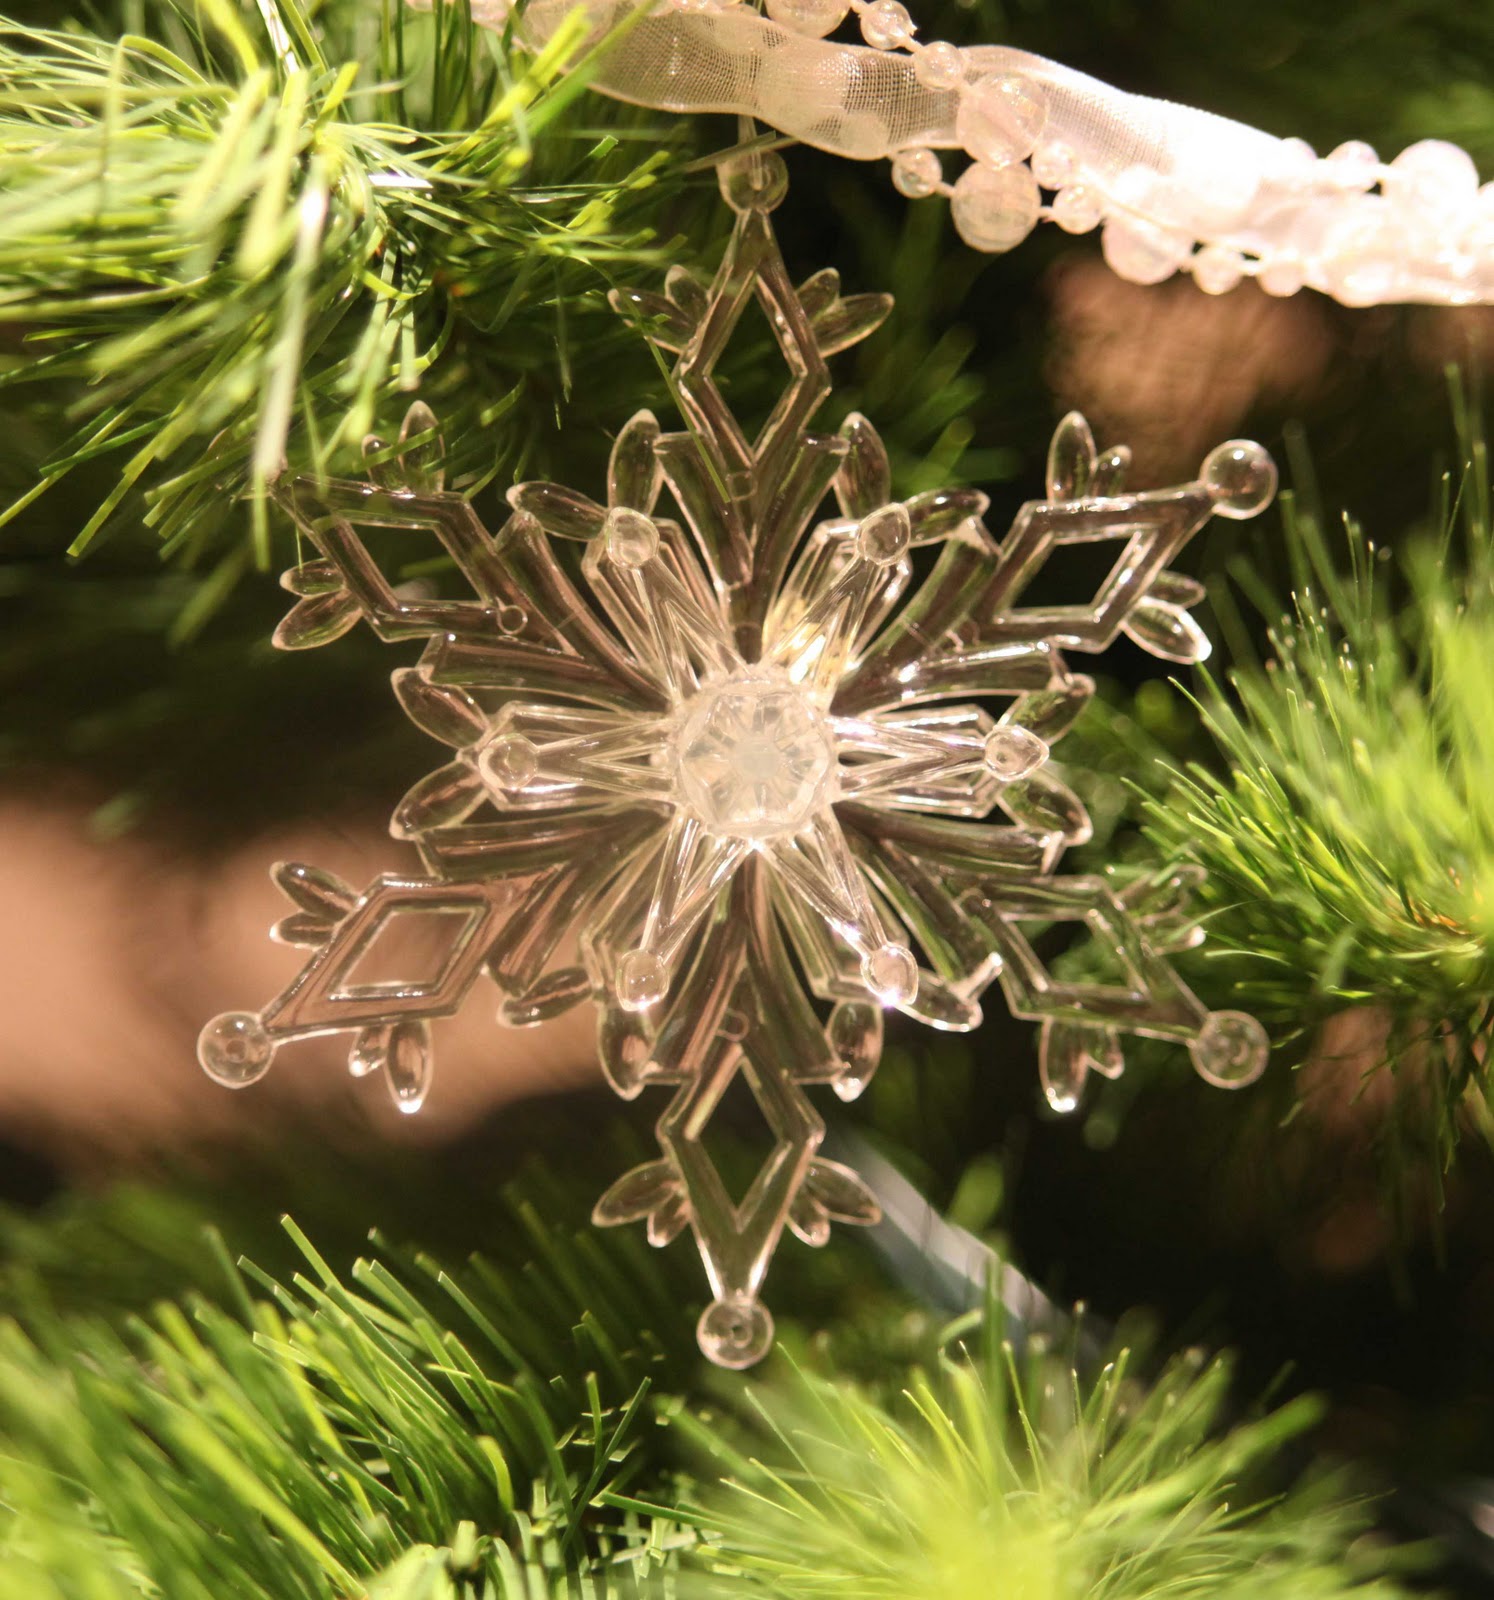
I love snowflakes in most shapes and sizes and these ones are more 3d than most allowing for a beautiful deflection of light

These amazing baubles have textured glass on the inside making them appear to be full of frost or snow. They also have a mesmerising iridescent glow.

My favourite new baubles with glass strands that stretch from one side to the other.
Most of the baubles on my tree were bought from Appleton Christmas Tree Barn. Well worth a visit if you live in Oxfordshire. They have a fantastic range and are lovely people to boot. They also sell wonderful fresh cut trees.


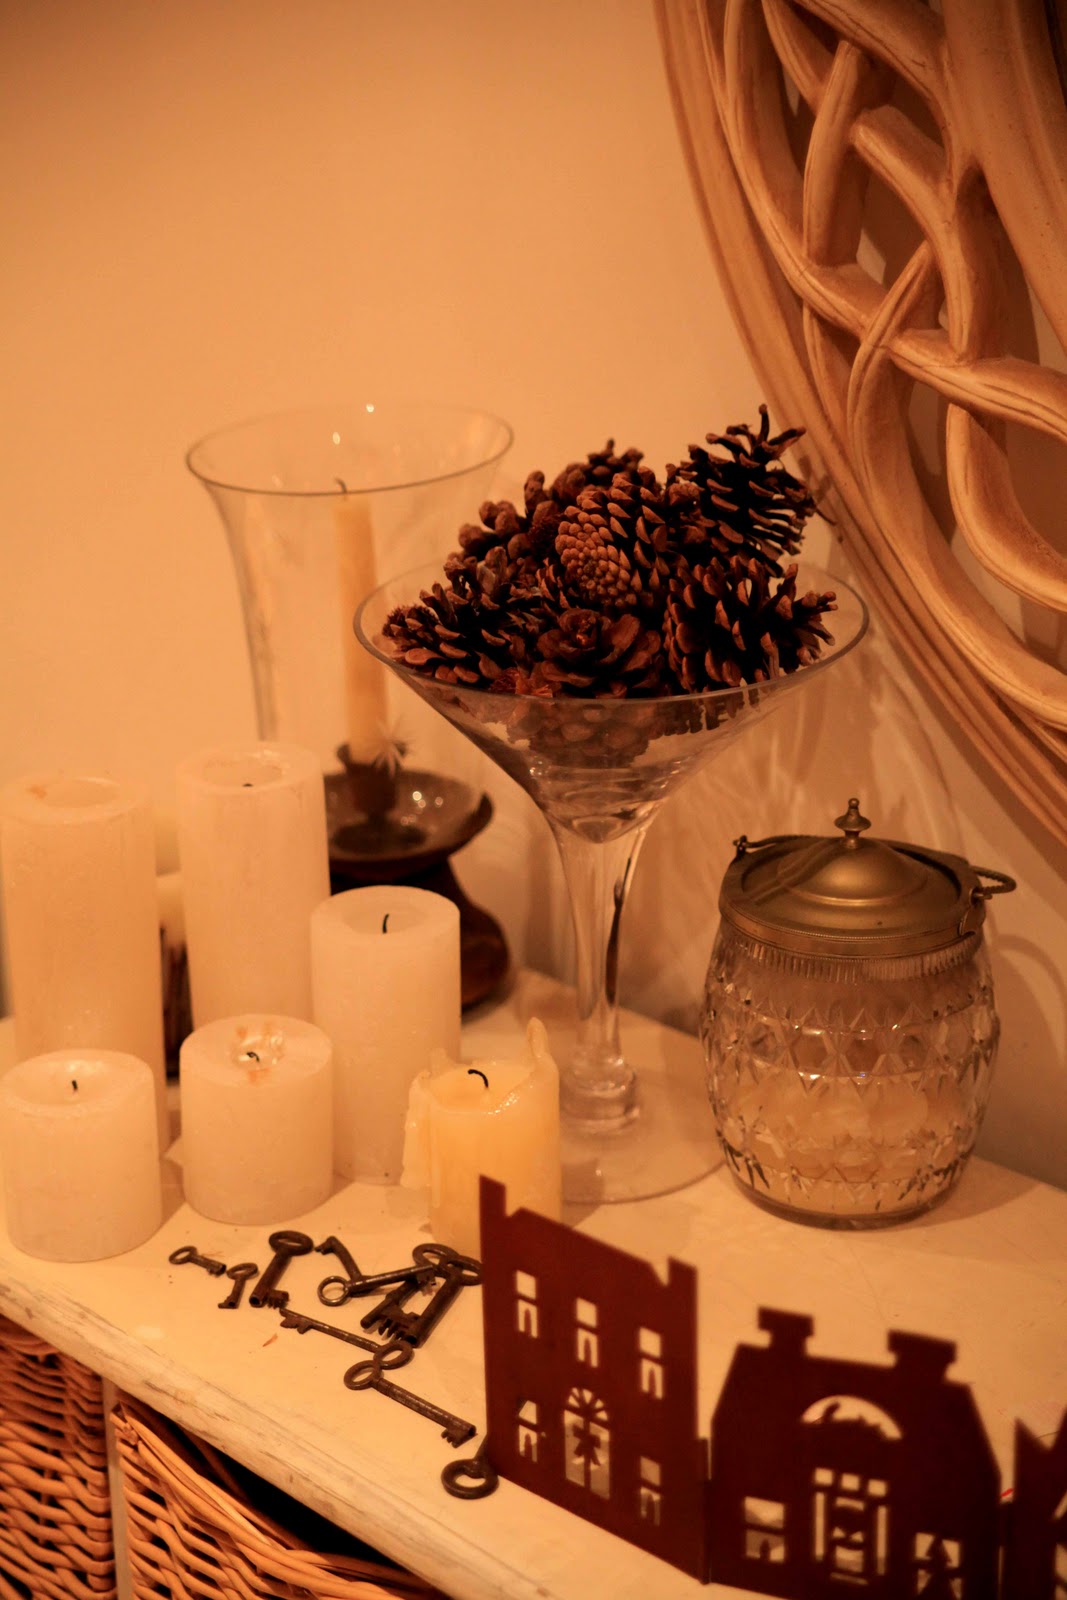
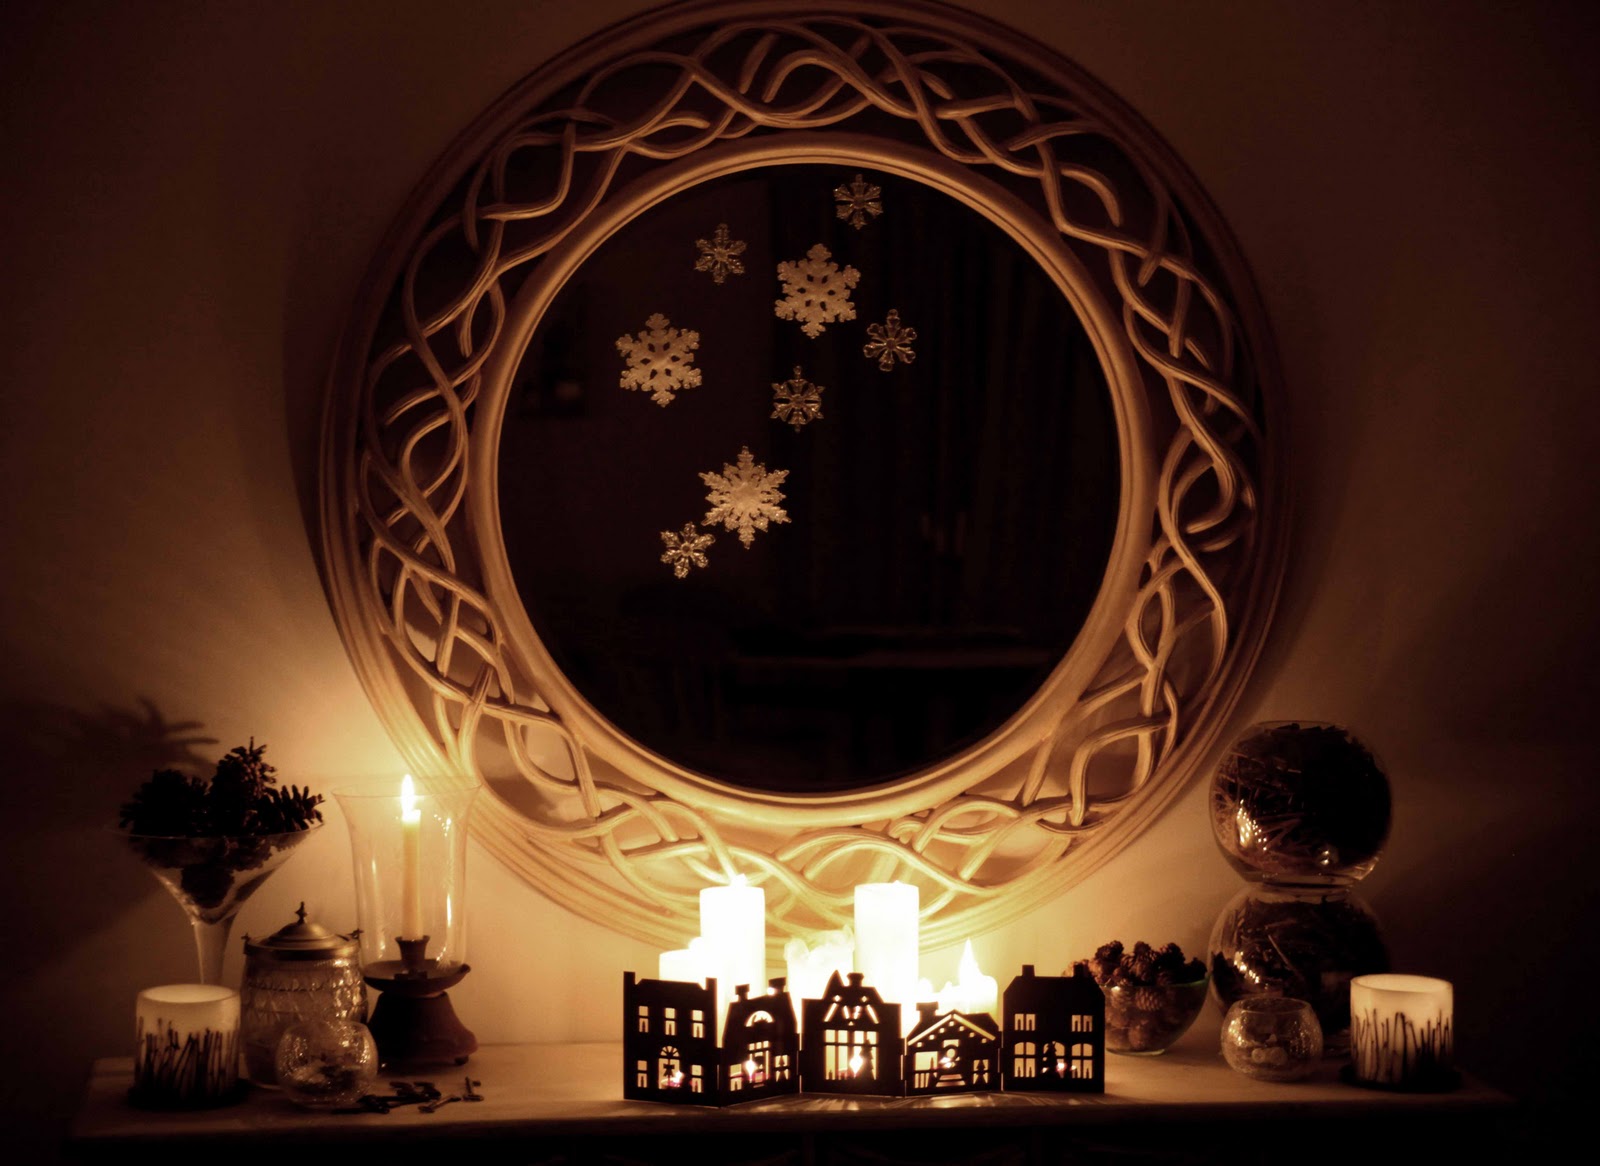
Next up is my sideboard display. A new space that I will be using just decoratively I think as it brings me so much enjoyment!


 From left to right we have a candle votive with twigs in (used to be a candle itself but once it hollowed out I just used tea lights inside to light it.)  A tall vase with large pine cones. A cut glass biscuit barrel that I have put a candle in to (not lit). In front a crackle glass jar with Buttons in brown and cream shades.A collection of old keys. My hurricane lamp (see earlier posts). A collection of church candles various heights and in front a rusted street scene silhouette. Then a recycled glass bowl of small pine cones (collected when I picked my sloes). Another crackle glass button jar and twig votive. Behind 2 goldfish bowls (from a friends wedding) filled with the rusty nails we pulled from the floor!
  On the mirror I have adhered some glass snowflakes.


I still have to share with you my door wreath tutorial (caught a passer-by admiring it whilst walking her dog the other day - which secretly pleased me as I made it from collected twigs)

Hope you have a fun New year xx

19 December 2011

A bit Rusty

Hello hello,

Hope you all enjoyed my living room reveal. We will be taking a better look around soon but I wanted to share with you all this evening a fun and easy project that I recently completed that I really enjoyed.

I bought this little beauty about  a month ago from a charity shop (£3.95 - Woop). I absolutley love it. Check out the little stars etched in to the glass. They reflect the candle light beautifully.


Well at first I just put it on my new sideboard and arranged bits around it. I just couldnt quite make it fit. It was too shiney.

I quite like chrome in certain  places eg my kitchen has plenty. But in this case it just looked too cold and stark. If only it was all rusty I thought. Then it would match the 2 bowls of nails that I pulled from the floor that now serve a decorative purpose along side the hurricane lamp.

So on to the web I went. I read literally dozens of forums and articles and found lots of good suggestions for actually rusting things. But aside from my impatience (and the fact that I'm not sure if chrome even can rust or not -I'm also not certain that its even chrome) I decided that I would find a quicker way of making this happen. Lots of blogs and articles call for peroxide - I don't have any peroxide and honestly I'm not sure how much I would use it even if I did. I found the product below after much searching and decided to go for it because it allows you to rust almost anything - wood, plastic,  you name it, you can rust it.

 It can be bought from here

So first off you need to prime the surface - spray on primer for me.


I went with a rust coloured primer just in-case I missed any,
Then you simply paint on the iron base coat and allow it to dry for 24 hours.


Once dry paint on the accelerant.


 Then watch it rust.


At this stage it looks a lot more orange than it does when its done. I kept applying accelerant until I was happy with the finish.

You can add a sealer at the end and for items that are going to be handled alot this is recommended.


I didn't bother as the base is just decorative and sits on the side quite happily.


So what do you think?

17 December 2011

The Big Reveal

As promised.  A BIG reveal. A long time in the making. Start to finish the new living room took us 8 months. On a budget and doing as much of the work ourselves as we could.

So the before:


AND the After


Barely recognisable huh? Sadly I cant take the image from the same angle as before because of the new wall. And In my next post I will put up some details shots of the room. (in fact it has already changed a little from these pictures!) Plus for festive fun I will be posting images of my decorating this year as well as a tutorial on my door wreath.


 I will be filling you all in on the Where? and How much? on later posts. Lots of the bits in the room were thrifty bargains - especially the dining chairs (£1.20 each). And some were more splurge items. Like the butterfly cushion.

This amazing cushion I bought from an Etsy shop. I love the detail on the embroidery!


Fab isn't it. This was my present to myself for all the late nights sanding and painting. I love it.

 Check out the Etsy shop I got it from below.
http://www.etsy.com/shop/maxemilia?section_id=7528755

Currently stocking this beauty:

Anyway enough from me. Do leave a comment and let me know what you think of my new sitting room!

Sara x

07 December 2011

Delays!

Hello lovelies,

Middle of the night and only now am I getting a quick chance to write. Its been manic - and I mean manic. Ever have those days where you are on the verge of having a temper tantrum! That was me today. Too many commitments. I should really stop volunteering but I like to be busy and I like to help people if I can.
Thus I haven't managed my big reveal yet. But don't worry it is coming. I want to do it justice.

And then when I'm not sooo manic I can also share with you the website my husband and I are designing for my good friend and Textile Designer Katy Casey. And some photos for the Christmas Canapé fund-raising party that I am hosting this weekend.

So for now Hang tight - but soon, very soon, pretty pictures. Here is just one to keep you going.

Inspiration for my next project. A Hallway.


My fav bits?
The mini station for each family member (but I would add a basket underneath each too - my husbands wallet and keys get dumped in the most irritating places)
The Panelling. Not sure why - I just love panelling.
The pegs along the top (but I wont have them as I inherited from the previous occupants a Gorgeous hat stand - proof that if you don't ask you don't get - They had 3 and were downsizing - this one was in the loft.)

Until next time x